Google OAuth2
1. Enable Google Gmail API
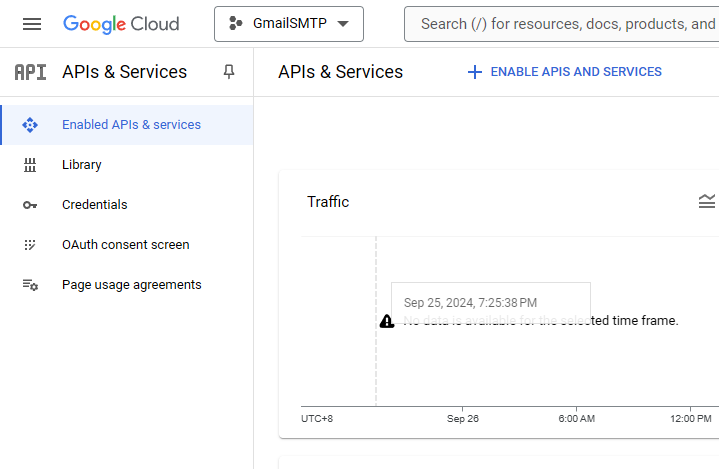
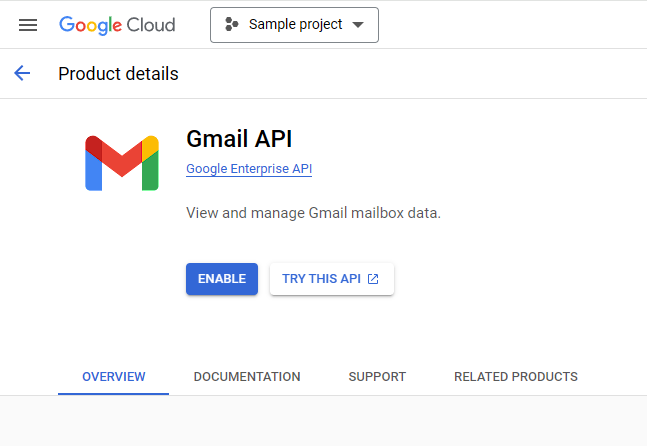
Before you start to do OAuth2 authentication, you need to enable Gmail API in Google API Console Site.
2. Acquire your OAuth 2.0 Client IDs
You need to acquire a OAuth 2.0 Client IDs to do authorization.
Give it a name and upload logo (download logo)

Choose application type: Desktop app
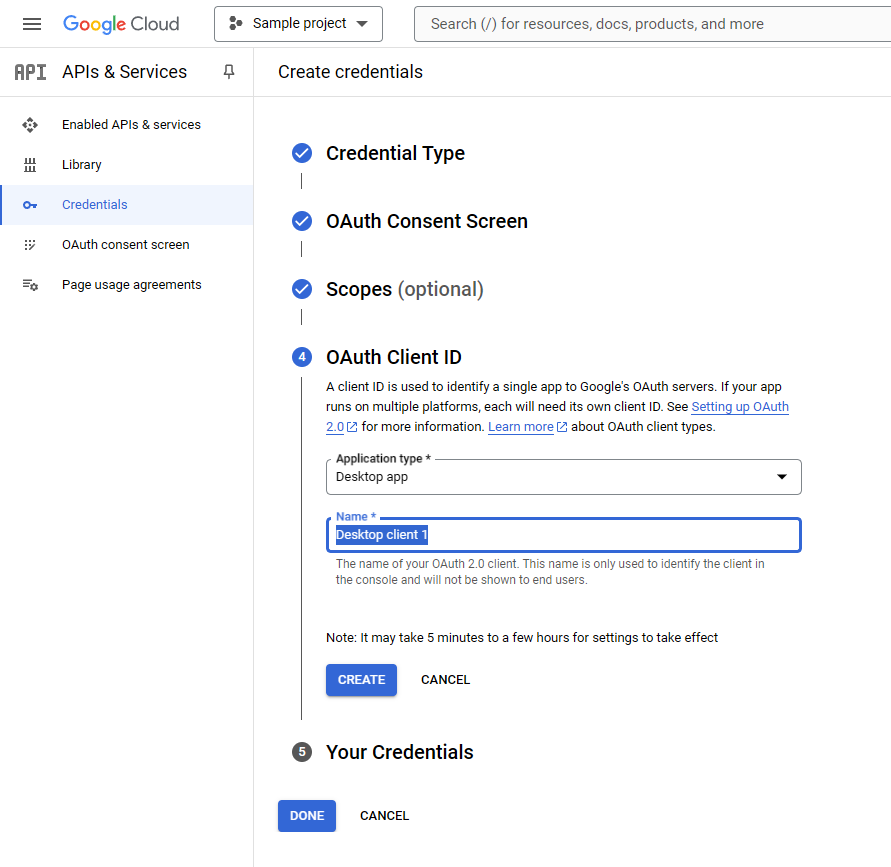
Add your Gmail email as test account

Finally you get Client ID and Client Secret.
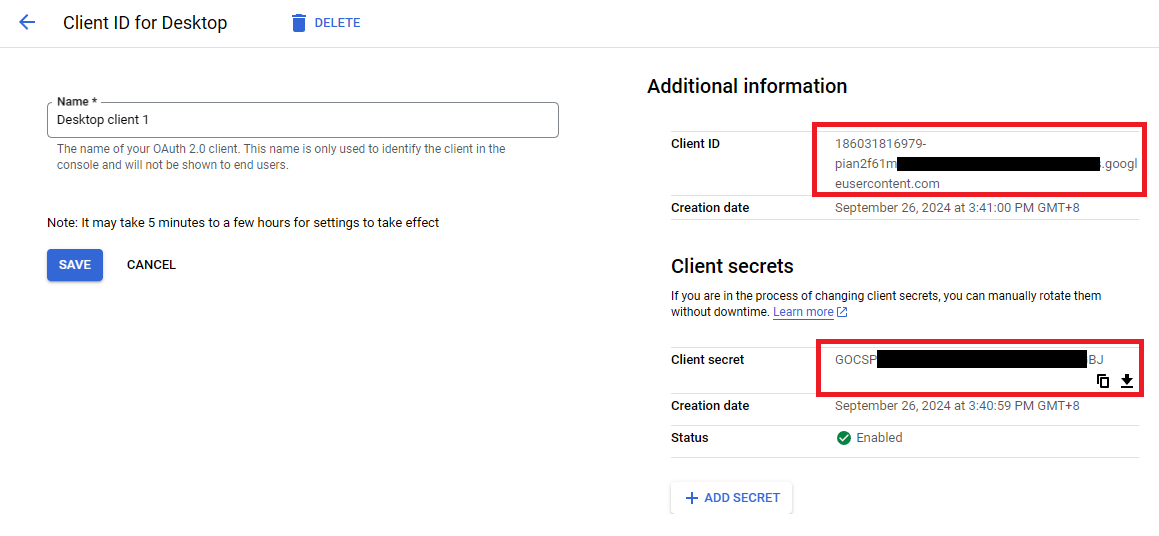
Then you could get Client ID and Client Secret for apply OAuth2 Authentication. Please copy them for next step.
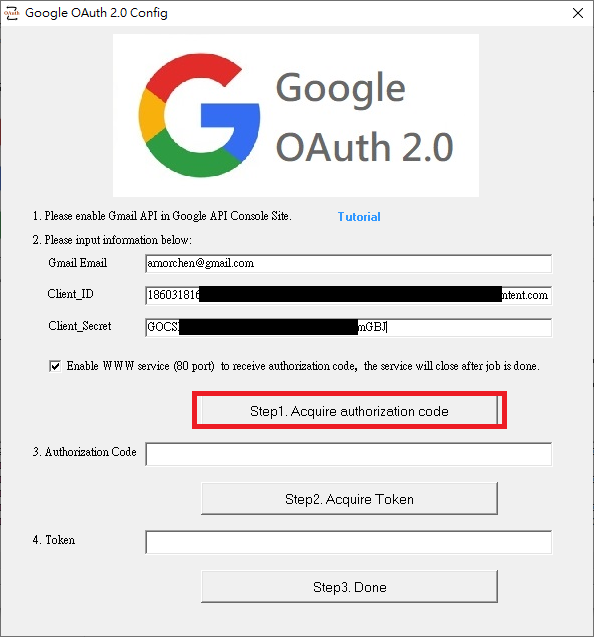
3. Input required information in RaidenMailOAuthProxy to complete settings.
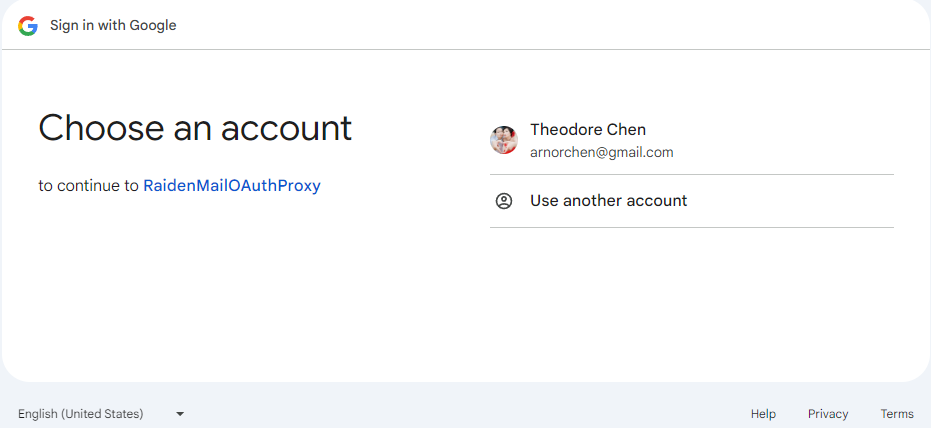
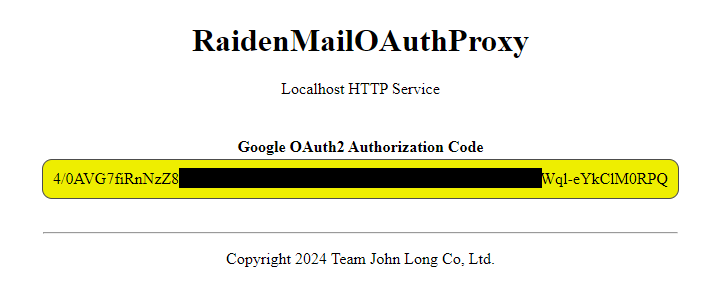
Authorization code is acquired.

Access Token is acquired.
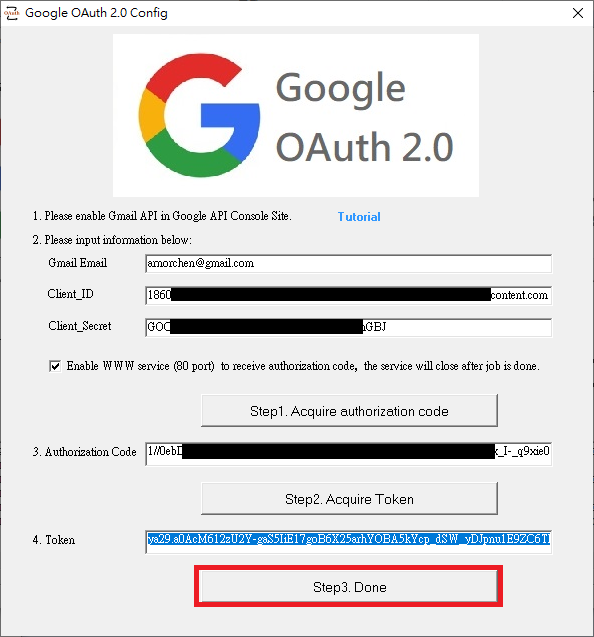
Congratulations! You already complete all steps for Google OAuth2 Authentication. RaidenMailOAuthProxy is ready to go.
Please be aware of the Acces Token is valid for 1 hour, and the Refresh token is valid for 7 days, which means you need to redo authorization in 7 days to make RaidenMailOAuthProxy works continuously.
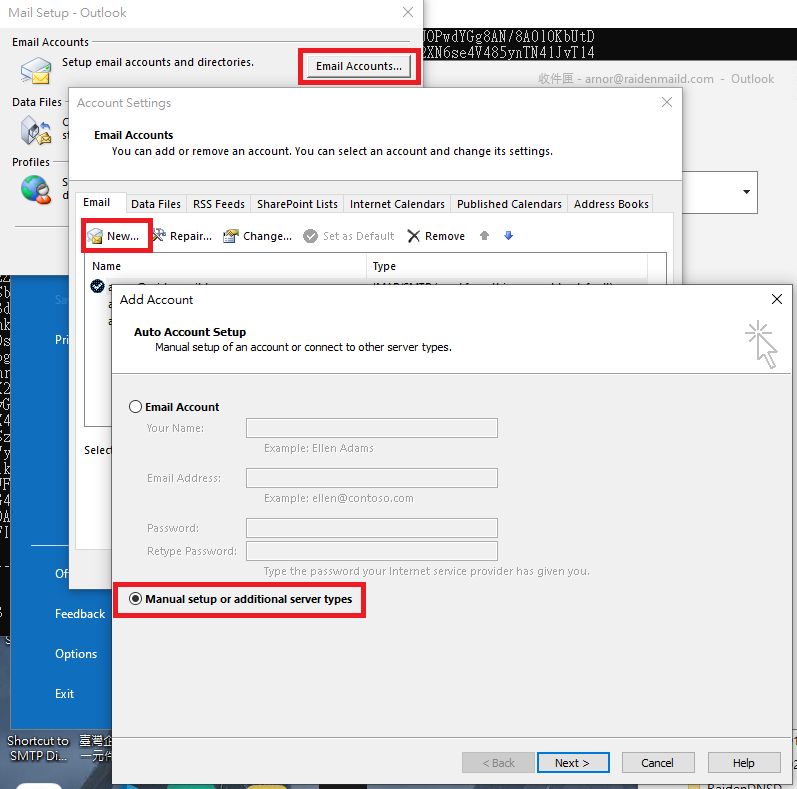
4. Configure your Mail Client. Here is an example for outlook.
-
Add an account and setup it manually

-
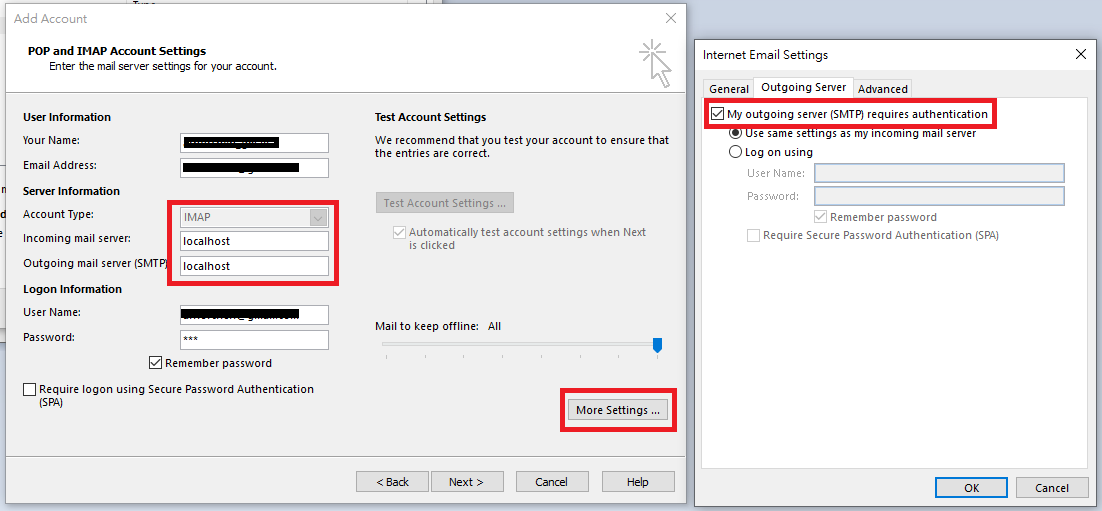
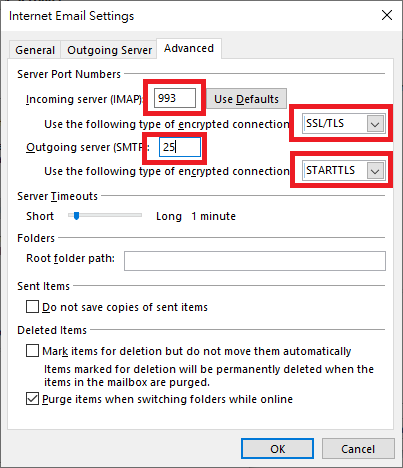
Input any password. SMTP uses 25 port with STARTTLS, IMAP4 uses 993 port with SSL.
-
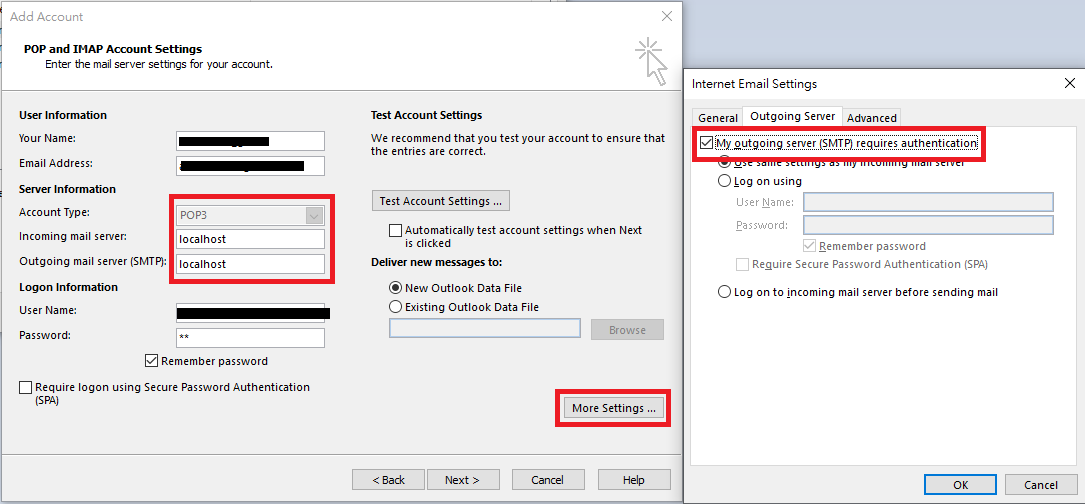
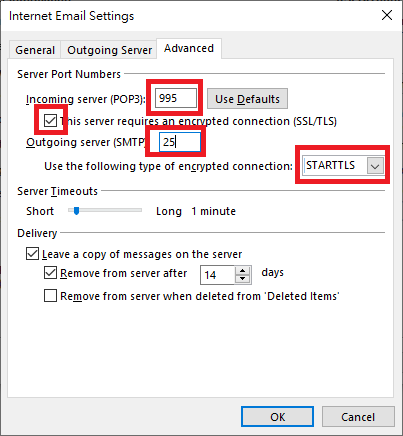
Input any password. SMTP uses 25 port with STARTTLS, POP3 uses 995 port with SSL.
